Friday, December 23, 2016

Nail Art: David's Tea Advent Calendar 2016 (Part 1)

So uhhh hi :) School, work, and moving took up a lot more of my time than I thought, so here we are in December! Let's get right to it: I'm a big nerd for David's Tea, so when the 24 Days of Tea advent calendar came up, I snapped it up right away. I loved last year's deep teal and penguin theme so much--I even did a value breakdown post--that I did some inspired nail art. I'm indifferent to this year's family of mice, but I adore the colour palette of pastel blue, jade green, and coral. Time for a skittles manicure!

David's Tea 24 Days of Tea Advent Calendar 2016 nail art
By the way, moving is annoying. Doing this manicure made me realize a bunch of my polishes are still missing! So some of the shades I used were actually my second or third picks, because I couldn't find the other polishes that I thought were much closer to the advent calendar shades.

David's Tea 24 Days of Tea Advent Calendar 2016 nail art
I haven't done any detail work in a while, so while it was fun to do the numbers in gold, I was definitely rusty. My favourite brush is a super long, fine eBay nail art brush that I hand-trimmed with a single edge razor to be even finer.

Friday, August 26, 2016

Colourpop Lippie Stix in Luau

The weather is finally heating up in Vancouver, so now feels around the right time to post about bright, summery lipstick! I placed a Colourpop order a long, long time ago to check out what all the buzz was about, and limited myself to buying just 3 Lippie Stix and 3 Lippie Pencils, one of which was Luau Lippie Stix. This true orange shade in Colourpop's hyper glossy finish was intended to be the replacement for Androgyne, the true orange OCC Lip Tar Stained Gloss that I kinda loved but ultimately returned because of the low coverage and patchiness.

Colourpop Lippie Stix
Colourpop Lippie Stix in Luau, Lumiere, Toucan
Surprisingly, I peeked out of my comfort zone to pick up some non-berry/purply shades: Lumiere, a matte mauve, and Toucan, a matte, bright red coral.

Colourpop Lippie Stix
Luau is the truest orange in my collection--everything else I own has a little bit of coral/pink in it, including Annabelle Orange Pop. I was pleased to see that the pigmentation and coverage was much better than OCC Androgyne. The bluish tones in my lips tone down the bright orange a little, making it slightly more muted than I think it would be on an average person. But you can see it's still quite bright in the photo below:

Colourpop Lippie Stix Luau swatch & review
I do love my mattes and semi-mattes but this super glossy finish on Luau is so pretty! If possible, it's even brighter and shinier in person.

Saturday, August 6, 2016

LUSH Popcorn Lip Scrub

You folks know how much I loved LUSH's The Kiss lip scrub--it was one of my favourite products of 2015! After such a good, lip-smoothing experience, I wanted to try another lip scrub, this time from their permanent (available all-year) range. Popcorn was the obvious winner, because who doesn't love popcorn?

LUSH Popcorn lip scrub review
Popcorn lip scrub gets its name from the inclusion of corn meal in the formula to help scrub off dead flakes, along with castor sugar and fine sea salt. The coconut oil and jojoba oil from the scrub also help keep lips moisturized. I love the sweet and salty smell, like salted caramel corn, and similar to LUSH Let The Good Times Roll cleanser.

LUSH Popcorn lip scrub review
While the sprinkles and hearts in The Kiss were cute and very Valentines-appropriate, they didn't do much for my lips; Popcorn is way more functional without that stuff. The ingredients list does include fizzy candy, but I've never noticed it and am not sure it does anything. At least it doesn't get in the way of a good lip scrubbing! The pale yellow scrub does not leave any tint behind.

I use a clean, dry, cosmetic spatula or similar tool to pick up and deposit a pea-sized amount of the scrub on the back of my hand and work it into my lips with my fingers. I avoid scooping product from the jar with wet fingers because the moisture can cause the scrub to clump up. I use it weekly (because lazy) but it can be used more frequently if needed. Lastly, although you can lick off the product when you're done (due to the edible ingredients), I prefer to just gently rinse it off.

It's perfect for prepping lips, especially before using a matte lipstick for smooth, even application. Lately, my favourite combination is to use Popcorn and then apply SkinCeuticals Antioxidant Lip Repair. Smoothest lips ever, seriously.

In addition to Popcorn, LUSH also has Bubblegum and Mint Julips available year-round, but I think I love Popcorn too much to stray. Which one would you use to keep your lips flake-free?


Available at LUSH: $9.95 CAD / 25g

Ingredients: castor sugar, organic jojoba oil (Simmondsia chinensis), fine sea salt (Sodium chloride), corn meal (Zea mays), extra virgin coconut oil (Cocos nucifera), fizzy candy (isomalt, lycasin, carbon dioxide), flavor

Friday, July 22, 2016

OPI Infinite Shine To Be Continued...

Hi all! It has been a pretty stressful month at work, but thankfully things have cooled off and all is back to normal - a perfect time to indulge in polishes with effortless formula and soothing hues.

OPI Infinite Shine To Be Continued nail polish swatch
OPI Infinite Shine in To Be Continued... (yes with the ellipsis) is a soft, periwinkle blue. It falls into pastel territory, but I like that it still has some colour and vibrance, compared to Lavendurable, which was pretty but soooo muted.

OPI Infinite Shine To Be Continued nail polish swatch
I'm a fan overall of original OPI's nail polish formula (Alpine Snow is one of my top two white polishes), and the Infinite Shine range is no different. The flexible, wide brush and smooth, forgiving formula are still present in Infinite Shine -- no clue if it really does have 10 days of chip-free wear though, since I am always changing my polish!

OPI Infinite Shine To Be Continued nail polish swatch
Doing my nails is such a peaceful, relaxing moment for me: I catch up on terrible reality TV, pick out a fun colour, and just unwind. How do you de-stress after a long week?

Saturday, July 9, 2016

Clinique Pretty Easy Brow Palette

Wayyyy back in December, I named Clinique Pretty Easy Brow Palette as one of my favourite beauty discoveries of 2015. I finally got around to editing the photos and sitting down to write this post to show what a difference a good brow powder can do!

Clinique Pretty Easy Brow Palette review
Clinique Pretty Easy Brow Palette made its debut last year as the all-in-one product to get your brow game on. The sleek, mirrored compact holds a brow powder, highlighter, and wax (fixative), as well as the tools needed to apply each product.

Clinique Pretty Easy Brow Palette review
The brow powder is a matte, cool-toned brown. It's not as buttery or pigmented upon first swatch as an eyeshadow, which is kind of a good thing: it's much easier to build up your brows than to apply too much and try to tone it down. And by the way, the colour is such a good match for typical Asian hair and skin tones. It took me a long time to start using brow product because a lot of my early drugstore picks for dark brown brows had a warm or reddish tint, which is not quite right for most Asians--you want something a little cooler or greyish.

The powder highlighter is a satiny, slightly warm vanilla shade. In comparison to the brow powder, the highlighter is closer to the texture of an eyeshadow. On my skin, it almost disappears (in a good way), leaving a subtle sheen that lifts the brows and anywhere else that you want a little pick-me-up.

Despite how it looks, the fixative has hardly any colour to it once applied, and further defines brows while still keeping the overall look natural. If you have very unruly brows, it may not help much to tame them, though.

Wednesday, June 29, 2016

Pastel Easter nails

Quick and long-overdue nail post today! I took a quick picture of these nails to share on Instagram close to Easter weekend, then promptly forgot about writing a proper post about them, soooo here we are.

Pastel polka dot easter nails
Direct sunlight
When I first did my nails in this polka dot, pastel skittle mani style, I was so in love with them. I took tons of photos in different lighting, indirect sunlight, direct sunlight, in my lightbox, etc.. so this post is also unintentionally serves as a comparison of different lighting sources for nail photos 9__9

Pastel polka dot easter nails
Direct sunlight
No joke, I got sick of this look less than 24 hours later. The pastel colours that I thought were so fun and spring-appropriate the day before were now toothache-levels of sweetness and baby shower-y. I couldn't get them off fast enough lol!

Saturday, June 18, 2016

Recap: London Drugs Beauty Event 2016

Another year, another preview of all the new and exciting things coming to London Drugs this year! This year's Beauty Event had 16 different brands presenting new releases in skin care, cosmetics, and fragrance. As always, I won't be writing about everything I saw that night, but hopefully you are just as excited about the favourites I'm sharing today. The lighting was very blue, but I've tried as best as I can to correct for colour accuracy.

Sally Hansen Color Therapy nail polish
Sally Hansen Color Therapy nail polish shades accompanied by matching jellybeans :D
A new range of nail polishes is coming this year from Sally Hansen. The Color Therapy line has argan oil infused into the polish formula, which promises to nourish nails.

Sally Hansen Color Therapy nail polish
I'm a little wary of the affect that the argan oil may have on the wear time of the polishes, but hopefully it will make a different to my sad, dry nails.

Wednesday, June 15, 2016

Sibu Sea Buckthorn: Nourishing Face Cream, Seed Oil, & Omega-7 Oil

Hi all! After a very long, totally unintentional hiatus, I am back and ready to blog again. Most of it was genuinely being way too busy/stressed with work/school/life to blog, but after things died down, it was surprisingly hard to get back into the habit of blogging again. I have a lot of catching up to do!

Sibu Beauty skin care review
Sibu Nourishing Face Cream, Sea Berry Seed Oil, Omega-7 Oil
We'll start with a skin care line that I have been wearing and testing while I was MIA: Sibu's sea buckthorn skin care and dietary supplement products. Sibu's headliner ingredient is a berry from sea buckthorn shrubs, said to be high in vitamins C and E, as well as fatty acids Omegas 3, 6, 7, and 9. These properties, Sibu says, make their sea berry products helpful in addressing "problematic skin"--from rosacea and eczema to acne.

My usual skin care review research turned up a 2014 post from The Beauty Brains (specifically about Sibu, actually) citing some studies indicating improved wound healing and potential to protect against UV damage. I wasn't able to find too many studies out there yet on the topical benefits of sea buckthorn oil.

Sibu Beauty Nourishing Face Cream review
Nourishing Face Cream is a medium-weight moisturizer in a frosted glass bottle with pump packaging. I like the product but find it better suited for my skin in colder, drier weather. With the weather warming up here (it was 30°C the weekend before last!), my face needs a very heavy blotting by afternoon. The product is broadly described as being "rescue for problematic skin", but because it contains so many emollient and occlusive ingredients, such as meadowfoam, soybean, argan, coconut, and avocado oils, I wouldn't recommend it for oily or acne-prone skin types. Those moisturizing ingredients would be right at home in a dry-skinned person's routine though!

Wednesday, April 20, 2016

Empties #5

It's been a while since my last empties post (or any kind of post at all, sorry T___T)

I know some people do a monthly empties post, but I basically just throw stuff into an empty David's Tea bag, and when it starts overflowing then I'm like yep, time to post about empties lolol. Depending on what new press samples I'm getting, it can take a very long while for me to get through even some of my favourite products! If I had to sum up the products in this post, it'd be "staple products". These are products I'm reaching for on a daily basis; the bare necessities (tea, hand cream, mascara, lip balm, etc) that I need to get through a day.

Our lineup this time:

Eucerin Calming Creme - I used this up really quick when I got an eczema flareup on my hands. The colloidal oatmeal is calming on the skin, and the mineral oil helps lock in the moisture barrier. I would slather this all over my hands and then put on some white cotton gloves to really seal the deal. Since then, I've discovered Eucerin Eczema Care cream, which I prefer a little more--it seems more hydrating and soothing since it's formulated specifically for eczema.

Nature's Bounty Hair, Skin & Nails Gummies - in a previous post, I said I liked Nature's Bounty's non-gummy supplement but wanted to try the gummies next, because who can say no to gummies? Unfortunately I finished the bottle and felt I got better results in terms of reducing hair fallout with the non-gummy multivitamin. Of course I don't have hard evidence of this, I'm just guessing it was some kind of synergistic effect of the biotin + vitamins/minerals that the non-gummy version has.

Lorna Vanderhaeghe GLA Borage Oil - I had a chance conversation with a nutritionist/naturopath about my eczema last summer, and she recommended, among other things, taking this specific brand of borage oil. I ended up not really looking into her other suggestions because the borage oil pills worked so well for me. At the time, I had been frustrated that the eczema around my mouth was "inactive" (not cracked, severely dry, or weeping) but still dry and red no matter what I did. I was genuinely so surprised at the improvement and how the redness went away within a week or so of taking this.  I've experimented with other, less expensive brands of borage oil and still get good results too. If you also have eczema, I can't promise that you'll have similar results, but I'm so much happier with the condition of my eczema now.

Saturday, April 2, 2016

Rose Floral Nail Wraps

Hi folks! Sorry for the radio silence this week; I've been preoccupied with adjusting to a new job, as well as the next module in my program. Of course, I couldn't let the week go out without squeezing in a nail post though!

Born Pretty rose nail wraps swatch + review
Here's another floral nail wrap set I received from Born Pretty. I loved the large rose design in shades of pink, orange, and yellow, and the way each colour is outlined makes it almost look like stained glass.

Born Pretty rose nail wraps swatch + review
However, on the nail, the rose print looks a bit big and the overall effect becomes more abstract-looking than floral.

Born Pretty rose nail wraps swatch + review
Wear time, application, and removal are about the same as my last nail wraps from Born Pretty: tip wear will show fairly quickly, but the price ($1.69 USD) is reasonable for an easy and fun look that lasts a few days. For application tips, check out my previous nail wrap post. 

Hope you're having a great weekend!

Saturday, March 26, 2016

Duckish-inspired nail art: colourblock and chevrons

I loved the colourful, graphic patterns on the Duckish skin care packaging, so you know what that means...
Duckish chevron nail art
(This photo was taken in artificial lighting, the others in this post are in natural light)
Inspired nail art time! I picked the pattern in Duckish's lavender-scented products because I knew I had just the shades to fit the bill: Essie Chills and Thrills, Essie I'm Addicted, and Sephora Formula X in Perfection.

Duckish skin care lotion stick review
Here's a closer look at the lavender pattern: the chevron is made from a bright blue zigzag underneath a dark brown zigzag. For some reason, I struggled a lot with wrapping my head around executing the offset chevron look.

Duckish chevron nail art
First, I painted two coats of Sephora Formula X White Matter, which is one of my favourite white polishes--the brush is excellent and the consistency is very smooth, so no streaks or dragging. Next I painted the zigzag lines in Essie I'm Addicted. This shade is a little bit sheer, so I had to paint over the same lines a second time for more opacity. After that, I painted slightly offset zigzag lines over the bright blue in Sephora Formula X Perfection (the website describes it as "smoky violet"; it's not, it's brown.)

Thursday, March 24, 2016

SkinCeuticals AOX+ Eye Gel, Physical Fusion UV Defense, Physical Eye UV Defense, + Conclusions

Finally, the last post in my three-part review of SkinCeuticals products! These are the last three of the products I received for review, and I'll also have some final thoughts about my experiences with the brand.

SkinCeuticals AOX+ Eye Gel
SkinCeuticals AOX+ Eye Gel review
AOX+ Eye Gel is a complementary product to Serum 10 AOX+; they are both intended to provide antioxidant and anti-aging benefits to the skin using ascorbic acid (vitamin C) and ferulic acid. I previously mentioned that Serum 10 AOX+ has a very mild but bitter scent; the same odd scent is stronger in the Eye Gel, though it's not so bad that it's a deal-breaker.

It also contains caffeine, which seems to draw mixed opinions about its efficacy as an eye de-puffing and anti-inflammatory ingredient, and butcher's broom extract, another possible anti-inflammatory ingredient. The presence of denatured alcohol worried me a little, but I didn't have any problems with it; I'm assuming/hoping it's there to help the beneficial ingredients penetrate the skin better.


SkinCeuticals AOX+ Eye Gel review
The gel texture absorbs easily and is suitable for daytime use. For night time, I would prefer something a little heavier. I appreciate the pump packaging that helps keep the antioxidant ingredients stable, but aside from hydration, I didn't really notice any difference in using it. Then again, my eye area doesn't have the inflammation or puffiness that the product seems to be targeting. I'm planning to use up my tube but I wouldn't be able to justify the $92 USD pricetag to repurchase.

Saturday, March 19, 2016

A Little Secret to Neat Nails: Tweezerman Professional Spiral Spring Cuticle Nipper

A common question I get: "how do you get your nails to look so nice?" The answer is actually kind of long and I swear I will get around to writing it out someday, but for now I'll share a little part of it: keeping your cuticles neat.

The cuticle is that annoying dead layer of tissue that sits on your nail plate near where your nail meets your finger, getting in the way of nail polish application if you don't push it back. If there's a lot of it, you might find that you get almost a "wall" of dead skin along your nail after pushing it back. That's where the Tweezerman Professional Spiral Spring Cuticle Nipper comes in.

Tweezerman Professional Spiral Spring Cuticle Nipper review
Note that clipping your cuticles is somewhat controversial: some argue that the cuticle should never be cut, because it can increase the risk of the cut area getting infections and other bacteria in. On the other hand, I've been cutting mine for a while now and have also had pro nail techs nip them, all with no problems. Keep in mind that I'm not a professional and this is just what works for me!

With that out of the way, let's get back to the product. Tweezerman's Cuticle Nipper is stainless steel, with a good weight to it. It comes with a sturdy plastic case to store it in, as well as a small rubbery cover to protect the nipper part when not in use.

Tweezerman Professional Spiral Spring Cuticle Nipper review
The edges of the nipper are super sharp and clip through the dead skin of the cuticle very easily. I think I've been using mine for at least a year and it shows no signs of dulling yet.

Once they do dull, I'll be sending them to get sharpened at Tweezerman HQ. This is a free service Tweezerman offers for their tweezers, nippers, and scissors, though you do have to pay for the shipping to New York.

Wednesday, March 16, 2016

The Body Shop Colour Crush Mint Cream + Pearls

Look, you guys know I can't really resist anything in the green or blue family, especially anything vaguely turquoise or mint. so when The Body Shop's Colour Crush polish in Mint Cream 640 was up for grabs during a certain makeup swap, I was alllllll over it.

The Body Shop Mint Cream and Born Pretty Pearls
It's a cool-toned mint and surprisingly actually relatively unique to my collection, as it's bluer and brighter than other mints I own. It's such a fresh colour for spring, and I thought it would pair perfectly with these flatback pearl studs from Born Pretty for a romantic but not over-the-top-cutesy nail look.

The Body Shop Mint Cream and Born Pretty Pearls
I love this shade. Application-wise, it's average: not too difficult, not jaw-droppingly effortless. Not bad at all for $8 CAD, and TBS often has promotions like buy 2 get one half off.

Speaking of value, $0.99 USD buys you 120 pieces of the flatback, iridescent-finish pearls in 3 different sizes. 4mm, the largest size, doesn't sound very big, but it's massive when you put it on a nail! I'm actually wearing only the 3mm and 2mm sizes on my nails because 4mm was huge.

Initially I applied the pearl studs just by gently pressing them into a thick coat of still-wet Seche Vite top coat. However, it just wasn't enough to hold them in place, and a few actually popped off while I was sleeping. I hadn't even done anything yet, like washing dishes or typing! I got much better wear out of them by putting them on while the top coat was still wet, and then applying a second layer of top coat over everything.

Removing everything with nail polish tends to eat off the iridescent coating on the pearls. I actually don't mind this, as it leaves me with matte white pearl studs to re-use for next time.

The Body Shop Mint Cream and Born Pretty Pearls
Ahhhh I loved how these turned out. I totally felt like a mermaid princess with them *‿*

What's a colour in makeup that you can't resist?


Saturday, March 12, 2016

Bridesmaid Makeup: product breakdown and a little advice

I haven't had a makeup post for a few weeks now and thought it was about time for another one. I've been fighting an eczema flare-up on my face (not a great look tbh), so I had to dig back into my backlog for this one.

Last year I had the special honour of being a part of MizzJ's wedding as a bridesmaid. Sheila and I opted to do our own makeup, and despite me being absolute shit at putting on falsies, I have to say that we made a pretty good looking wedding party ;)

I can't remember if this picture was taken before or after the bridal party serenaded the room with Boyz II Men's I'll Make Love To You...
This was my first time as a bridesmaid, so I was really worried about the possibility of the professional photos turning out badly because of my makeup, or my makeup looking out of place compared to the bride's professionally-done makeup. Thankfully I think I did an okay job. Of course I didn't have time to take photos for this post on the day of the wedding, so I recreated the (simple) look a few weeks later at home.

Us girls stayed hydrated and ate well for the days leading up to the wedding. We all planned activities with a lot of sun exposure like swimming and hiking for after the wedding, in case we got sunburned or tanned significantly. We also got the rowdy girls' night out stuff out of the way long before Hawaii, so we were bright-eyed and well-rested for the morning of the wedding.

Wednesday, March 9, 2016

Duckish Skin Care

Hello, hello! I have a cool new, independent, Canadian (!!!) brand to introduce you folks to today. Duckish is handmade in Canada and proud of it--products are made in Halifax, Nova Scotia, and the word "duckish" is a Newfoundlander term for dusk, the perfect time for a little self care with some seriously hydrating body products.

Duckish skin care review
Duckish's first product was the Diaper Rash Stick, a convenient, mess-free alternative to those thick diaper rash creams. Since then, they've branched out into bath salts, lip balms, and lotion sticks.

Duckish skin care review
Like these! The Lotion Stick is available in the large 2.65 oz size. The mini size is ridiculously adorable at 0.35 oz, and fits perfectly in a purse or desk drawer. The colourful label indicates the essential oil added to the product: orange for unscented (shea/no essential oil added), blurple for lavender, and magenta for pink grapefruit. There are also mint and tea tree oil varieties.

Friday, March 4, 2016

SkinCeuticals Daily Moisture, MetaCell B3, Antioxidant Lip Repair

I'm (finally) back with more on SkinCeuticals! Today's post features products that could be broadly described as moisturizers that would be applied after using Serum 10 AOX+ or Retexturing Activator.

SkinCeuticals Daily Moisture
Daily Moisture is an oil-free moisturizer intended for normal/oily skin. The texture is light and easily absorbed, and the lotion-cream has a very, very mild scent, though I can't quite describe it. While the lotion has a pretty, pearly look in the frosted glass jar, I don't think it imparts any kind of pearlescent effect to the skin. It leaves a smooth finish to the skin, so makeup applies well over top.

High on the ingredients list are glycerin (humectant), sorbitol (humectant), and cetyl palmitate (emollient). Other ingredients worth noting are sodium hyaluronate, licorice root extract (anti-irritant), and retinyl palmitate (antioxidant). Despite a pretty spiffy-looking ingredients list, I worry that the benefits of any antioxidants or plant extracts are not stable in this jar packaging. It's a nice moisturizer, but I don't consider it superior to other moisturizers I've tried that are at a similar or lower price point.

SkinCeuticals MetaCell B3
SkinCeuticals MetaCell B3 review
MetaCell Renewal B3 is a recent-ish addition to SkinCeuticals' "Correct" line-up of products intended to address issues such as slower cell turnover, environmental damage, and fine lines, all in an airless pump tube. This product boasts 5% vitamin B3, aka niacinamide, which has tons of benefits including improving skin elasticity and barrier function. Note that using a product with niacinamide together with acidic products can cause some flushing; I've tried it on separate occasions after Serum 10 AOX+ (vitamin C) and AHA products and had a little bit of flushing but it calmed down within a minute.

SkinCeuticals MetaCell B3 review

Wednesday, March 2, 2016

Nail swatch collection update

Four years ago, I posted about how I finally figured out a pretty good system to keep track of all the shades, finishes, etc in my nail polish collection. To date, it is still one of my most popular blog posts. It has been a super convenient resource when I'm picking out polishes and comparing one similar shade to another.

Every time I got a new polish (press sample or personal purchase), I swatched it on a nail stick right away. Then I ran out of nail swatch sticks and had THE WORST luck ever buying more sticks that exactly matched the ones I already had: eBay sellers I purchased from before didn't carry them anymore, I was getting product that didn't match the listing, etc. After about a year or two of running out of swatch sticks, I caved and settled on these swatch sticks that were close, but very slightly shorter than the originals /sigh

Anyway, I thought it would be cool to share what my swatch system looks like now (hint: it's gotten a lot bigger). There are a lot of photos because I had way too much fun photographing this.

nail swatch stick collection
I have 7 rings right now, organized by colour: pinks/reds, oranges/yellows, greens, blues, purples, glittery top coats, and neutrals. Neutrals is the biggest ring because it encompasses colours like black, white, beige, grey, metallic foils, etc, but my blues and greens also need to be upgraded to bigger rings.

This is what my blues ring looked like, circa 2012 (20-22 polishes)...

Saturday, February 27, 2016

Vintage floral nail wraps + application tips

Okay, so you want your nails to have beautiful patterns and designs without the $$$ or spending hours hunched over your nails (ahem)? Two words: nail wraps! I don't have much experience with them, but I recently tried out these rose floral wraps from Born Pretty:

Born Pretty vintage rose floral nail wraps
I love the delicate vintage vibe of these nail wraps, and for $1.69 USD (14 pieces), it's kinda hard to argue with that value. I wanted to do high tea or something equally fancy so bad while wearing these--wouldn't they look awesome while I'm sipping out of dainty china?

Born Pretty vintage rose floral nail wraps
It did take some trial and error, so I have some tips/general thoughts if you're new to this stuff too.

First, due to their shape, these are best on nails with relatively straight sides. You can see that the nail shape of my little finger is oval-ish, widening in the middle before tapering again, which causes a lot of naked nail to peek out along the sides.

If you're only planning on wearing your nail wraps for a day or two, you can skip the base coat, which will make them easier to remove later by peeling them off. For added longevity, wear both a base and top coat, remembering to cap your tips. I've noticed a very slight bit of funny bubbling and wrinkling occur after applying my Seche Vite top coat, but the extra shine and durability is worth it if you ask me.

Something else to note: I applied them with top coat and then went to bed. In the morning, I took a shower and then took my swatch photos. I did pretty much nothing else with my hands up until that point, and yet it was already showing slight tip wear.  I think the heat and moisture from my shower also caused additional bubbles to form :< These are a fun option for a few days if you don't do too much with your hands, but the durability is not great.

Born Pretty vintage rose floral nail wraps
Okay, so how do you get them on? The nail wrap itself is sandwiched between a cardstock-like backing on the adhesive side, and a thin plastic film on the design side. I got the best results with these steps:
  1. Remove the paper cardstock-like backing. It's thin and may take you a few tries to separate from the nail wrap. Position the nail wrap and smooth the wrap on the nail from the cuticle, only just down the centre of the nail length-wise.
  2. Using a smooth, rounded tool (I use the handle end of a nail art brush), smooth the nail wrap from the centre outwards. It will not sit perfectly on the nail yet because of the plastic film.
  3. Remove the plastic film on the top side. Because of the thinness, it is tricky to find the edge to separate from the nail wrap, and takes some patience. It's the hardest/most annoying part of the whole process.
  4. Smooth the nail wrap down again with your rounded tool, always working from the inside out. Be sure that the edges are fully sealed to the nail.
  5. Use a medium grit nail file (~180) to remove excess nail wrap from the tips. You want to file in a downwards motion to encourage the nail wrap to wrap itself underneath the free edge of your nail.
And that's it! Easy, pretty, and quick. There is a pretty good range of sizes included in the set, so you should be able to find a fit in there for you (I was somewhere in the middle). What about the too big or too small ones? I'm working on a post for that soon ;)

Have you tried nail wraps before?


Available at Born Pretty ($1.69 USD)


Wednesday, February 24, 2016

New online beauty destination for Canadians: Scarlet & Julia

I so should not be looking at more makeup to buy, yet here I am stalking the lipstick section of a certain website :P Scarlet & Julia is a new online retailer of all things makeup and skin care, promising to be the new "online beauty destination". Best of all, it's Canadian! With the USD/CAD exchange rate looking so miserable, it's a lot tougher to justify an online purchase since so many e-tailers are based on US currency. It's perfect timing to check out a new Canadian option.

On Scarlet & Julia, you'll find familiar names like Lise Watier, Cargo, and Stila, but also a number of cool, harder-to-find brands like Lipstick Queen, Blinc, and Coola. Here's my (surprisingly practical) mini-haul, with some help from a gift card provided by the nice folks at Scarlet & Julia:

Scarlet & Julia Canadian online beauty retailer
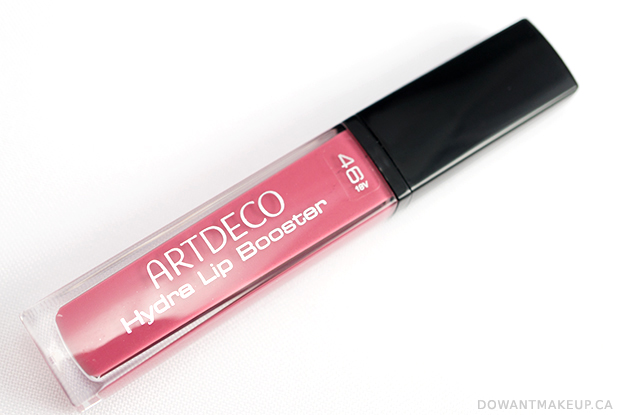
I've been curious for a while about the 
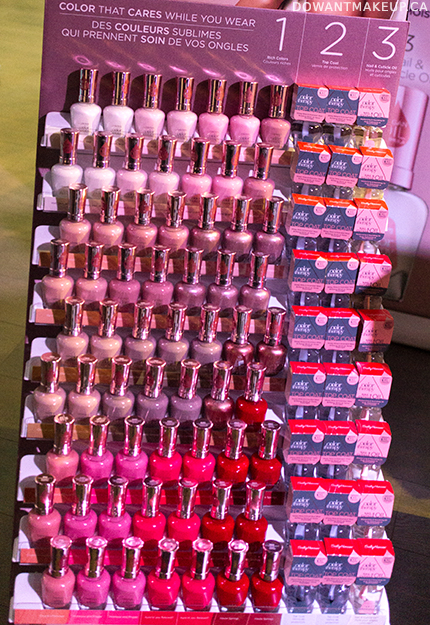
Anna Sui Nail Treatment Oil ($15 CAD). The bottle is so cute: it's in the shape of a gown, and the oil itself has a beautiful rose scent. Scarlet & Julia's nail polish section is a bit lacking at the moment, but there's a decent selection of nail treatments.

I fell in love with Roger & Gallet's Fleur d'Osmanthus scent when I visited their location at The Bay downtown. When I saw that S&J carried this brand, I just knew I had to pick up something with this scent. The Hands and Nails Cream ($10 CAD) is super fragrant and absolutely bursting with the bright, white floral scent of osmanthus.

I bought a Living Proof starter kit a million years ago and became a convert. There is no mousse that I've tried that compares to the Full Thickening Mousse ($32 CAD), and I'm so glad that I have a full-size version now so I don't have to carefully ration my teeny starter-size can anymore!

Scarlet & Julia Canadian online beauty retailer
Something else that sets Scarlet & Julia apart is the Beauty Outlet, updated weekly/biweekly. You do need to sign up for a free account to view this section, but it's worth it to check out some legitimately awesome deals. For example, I found a Burberry eye palette from the Splash summer collection marked down from $50 CAD to $15 (it was also available through StrawberryNet for $96.50 o__o). I also saw eyeshadow palettes and blushes from past Lise Watier collections (Aurora, Expression, Eden Tropical--all gorgeous) on sale, but there are many more brands. It's definitely something I'll be checking up on from time to time to score a great deal.

Shipping is free for orders of $75+, and below that is flat rate shipping of $9.95 to anywhere in Canada. I haaaate paying for shipping. I'd much rather add a little something extra to my basket than pay shipping, and with so many covet-worthy products available on S&J, it's dangerously easy for me to do.

Lastly, I'm happy to report that 1% of sales are donated to Look Good Feel Better to support women fighting cancer. This non-profit provides services to help manage the visible effects of cancer treatment; it's a great cause and very fitting for a beauty retailer.

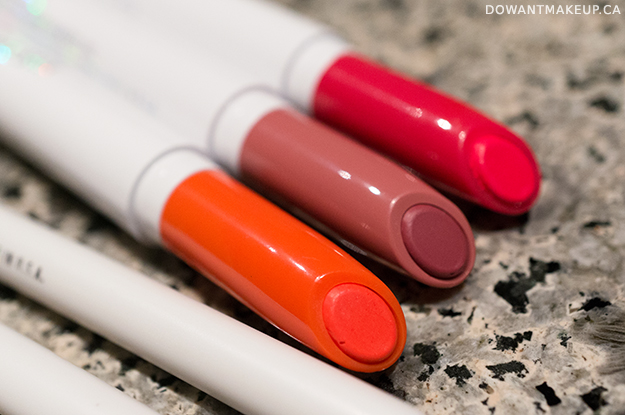
Canadians, are you still shopping on US sites? What would you pick up from Scarlet & Julia? I'm so into this one and this one from Lipstick Queen *___*

Monday, February 22, 2016

ArtDeco Mystical Forest: FOTD + swatches

I'm back with more from ArtDeco's Fall/Winter Mystical Forest collection! I posted about one of the nail polishes previously, but makeup always takes a bit longer to test and photograph. Today I'm sharing some details and looks using the lip and eye products, including a unique eyeshadow system! Though it's a seasonal collection, these shades are still available for purchase online at retailers like Beauty Bay.

ArtDeco Mystical Forest Hydra Lip Booster 46 swatches & review
Hydra Lip Booster is a lip gloss that promises translucent colour, shine, and hydration all in one. 46 Translucent Mountain Rose is a neutral-toned dusty rose; on my discoloured lips, it evens out the discolouration just a bit but dark spots are still visible. This would be a great staple in a lip wardrobe, since the MLBB-ish soft rose shade pairs well with any makeup look.

ArtDeco Mystical Forest Hydra Lip Booster 46 swatches & review
Application using the standard doefoot applicator was very smooth, and it doesn't settle into lines. I hate glosses that feel super thick and sticky, so I'm glad that this one wasn't too heavy and very comfortable to wear. The formula is forgiving even if you have chronically-dry lips like mine.

Sunday, February 21, 2016

OPI Infinite Shine Lavendurable

Even though it'll still be quite some time before spring, I can't help feel drawn to pastels and florals lately. OPI Infinite Shine in Lavendurable fits the bill perfectly: it's a super soft, muted lavender.

OPI Infinite Shine Lavendurable swatches
It's almost like an off-white that's just barely tinged with lavender. In certain lighting/angles, it could be mistaken for a neutral shade.

Application-wise, it doesn't stand up to the very good experience I've had with OPI polishes so far. This one was challenging and required a light touch to avoid streaking or lumpiness, on top of being a bit thin. I'm wearing two coats here, which still leaves a slight visible nail line. But it's so pretty, I can't even be a little annoyed at it.

OPI Infinite Shine Lavendurable swatches
What are your go-to spring nail polish shades?

© Do Want Makeup 2016 | Blogger Template by Enny Law - Ngetik Dot Com - Nulis