Monday, December 31, 2012

Gingerbread and things

I had originally planned to post photos of Hyatt hotel's Gingerbread Lane around Christmas and then have a 2012 recap post, but holiday fun and XCOM sorta got in the way. So! I'm merging the two (but mostly it's gingerbread and a paragraph at the end)

The Hyatt in downtown Vancouver does a Gingerbread Lane every year around Christmas, where they display gingerbread houses made by various clubs/schools/professionals for voting to raise money for Make-A-Wish. It's a chance to see some really creative takes on a classic gingerbread house.

Wizard of Oz gingerbread! The Emerald City is covered in green rock sugar. Auntie Em's gingerbread house was perched on top of a spinning tornado!

UP gingerbread house, complete with Carl, Russell, and Dug :>


The Nutcracker in gingerbread. I really loved the painted panels on the sides.

The idea of this one was Santa's theme park, with a ferris wheel, cotton candy, and my favourite, a Santa roller coaster.

This one was one of my favourites. It stood out for being a little more traditional in that it uses just gingerbread and less fondant/sugar decorations but the level of detail and intricate piping really amazed me! The display could be rotated to see four equally-detailed holiday scenes.

2012 went by in a flash. I didn't post as many reviews/FOTDs as I would have liked, partly because my facial eczema had a bad year, but I hope you enjoyed all my nail posts! :> Next year I hope I can post more consistently and with a wider variety of beauty (and non-beauty) content. Please have a safe and happy new year. See you in 2013!


Friday, December 21, 2012

Snowflake nails

China Glaze Kinetic Candy  •  (ring finger) Sally Hansen Insta-Dri Blue-Away  •  white acrylic ink  
I think all the holiday/winter-inspired nails popping up on my Pinterest and Tumblr finally inspired me. Vancouver recently had its first real snow of the season, and coincidentally, my very first freehand nail art features snowflakes :>

I have a soft spot for icy blues, so I did it over China Glaze Kinetic Candy for most fingers, and Sally Hansen Insta-Dri Blue-Away on the ring finger. The two are fairly close, but Blue-Away is a brighter and more vivid blue, while Kinetic Candy has a tinge of grey to it. I used white acrylic ink for the snowflakes but white polish works fine too, as long as it is fairly opaque.

I like the index fingernail the best for the extra-dainty snowflake on the lower corner. It's much more fool-resistant to have 2-3 partially-showing snowflakes than to attempt to paint on a full one (see: pinky finger) and lets more of that lovely base colour come through.

Confession time: I only did my right hand, left hand is snowflake-less. All it took was one shaky line on my fingernail and I thought, LOL NOPE. I always admired nail artists for their amazing freehand nail art but now I have to give extra respect to those that paint on both hands. I definitely need to practice.

I really love how these turned out; it is shockingly easy to do but the results are quite nice, I think! Although it is pretty simple, I can post a quick picture tutorial if anyone is interested.

Wednesday, December 19, 2012

Swatching my nail polish collection

By swatching, don't mean painting my nails for posting, but painting swatches onto display items to refer back to. Since all my polishes are tucked away in a drawer, it's hard to see what I have at a glance. Because polishes can look different applied vs in the bottle, it's not just as simple as pulling a bottle out and looking at it, either. Some arguments for swatching:
  • make it easy to keep track of a hoard collection that is growing terrifyingly quickly
  • make it easy to compare polishes for dupes/future combinations
  • test nail art combinations without sacrificing my own natural nails
  • admire all the shiny colours
My first attempt was swatching polishes onto strips of tape and sticking them into a blank notebook. This actually isn't a terrible idea, but I felt it was difficult to plan for future polishes. My green polishes might only need a page now, but what about a year or two from now? How many blank pages should I leave for future greens before I start a blues page? Plus, I could swatch my greens in order of hue now, but what about when I get a shade that fits right in between two that were already swatched? Seriously, these kind of thoughts drove me crazy.

After a few days of research (i.e. Googling), I found prettier alternatives in nail display sticks and wheels. I've noticed many nail bloggers use nail wheels (nails arranged around a plastic circle) instead, but again the fact that the positions of each swatch relative to each other are fixed bothered me. The inner circle also doesn't give you much room to label each swatch; I've seen it done successfully but many others keep a numbering system which seems inconvenient. However, nail wheels probably store way easier since they lay flat and can be stacked. The nail sticks are like the ones you see at some salons or Sally's: they are long enough to label and most importantly, they can be arranged and rearranged to my heart's content. Sold!

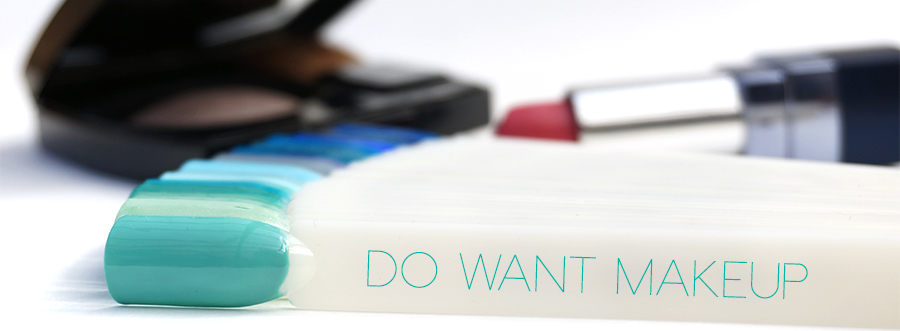
Here's basically how the nail sticks arrive, sealed in ziplock bags. There are tons of eBay sellers offering what seems to be an identical product, but for reference the one I bought from sold them in sets of 50 for $5-6 CAD and free shipping. Most also include a long bolt and nut to slip through the holes at the end of the stick to make a fan.

Extra purchases: I prefer putting my sticks on loose binder rings; I feel like it's easier to look at them this way, and I can fit more on to a ring than I can on a bolt. I've seen binder rings sold packaged up, but I bought mine individually from a university bookstore for $0.25 each. I also picked up a Sharpie for CDs/DVDs, which would help my writing not smudge as easily on the plastic sticks (especially important because I'm left-handed!)

I use the ultra fine end of the Sharpie to write the name of the polish, and the fatter end to make 2-3 dots indicating how many coats I used on the swatch.

Tuesday, December 18, 2012

So I made a pink unicorn with LUSH FUN

After my LUSH FUN post, a few people asked me to make other things (mostly Pokemon) but unfortunately I didn't have the colours to make them. Sorry guys, I only have pink, blue, and green! Then Tracy asked for a pink unicorn and I thought, hey I can actually do that...

My level of success is questionable but the important thing is that I did it, right? Right?? *crickets chirp*

He is a bit stumpy and awkward but I like him anyway. Actually, my favourite part of him is the tail.

(I promise a less derpy post is coming tomorrow.)

Wednesday, December 12, 2012

butter London All Hail The Queen

Finishing off the swatches from my butter London Coterie order is All Hail The Queen, a beige with holographic shimmer. If it wasn't for the Coterie sale, I probably never would have picked it up because I was convinced it was a near-dupe to the Orly Nite Owl I already owned and loved dearly. Happily, I was wrong.

All Hail The Queen is absolutely packed with holographic shimmer; I would already love the flattering beige base if it was all by itself, but the holographic effect makes it extra-special. I admit I'm not a big fan of holographic polishes, but in All Hail The Queen it's there just enough to add dimension (subtle enough that you can get away with wearing it in a very conservative workplace) but still wows you when you look close enough.

Orly Nite Owl (ring finger) from the Birds of a Feather collection also has a beige base that I thought would be identical to All Hail The Queen, but side-by-side you can see Nite Owl is taupe-ier and is cooler-toned, helped along by the fine silver shimmer. This was my favourite "beige with a shimmer twist" polish, but it's been replaced by All Hail The Queen; I like that it's a bit warmer and something about it is just so, so pretty and elegant. Nite Owl looks a bit thick here because I applied three coats to match the three needed for All Hail The Queen, but only two are necessary.

Close-up, with flash
Despite the differences, I still don't think it's necessary to have both. They are still very close. Nite Owl is a gorgeous polish and roughly half the price of All Hail The Queen, something to keep in mind if you're on a budget. I wish I could have photographed them in natural light though, my indoors/artificial lighting doesn't do either of them justice, not to mention it tends to make my fingers take on a lovely red lobster-iness. (Edit 12/17: I've added some marginally better photos in natural light at the bottom of the post!)

Which would you choose? Are you a fan of holographic shimmers?

Natural light!
Flash in natural light
We had some rare sunlight so I whipped out my camera ASAP to snap a few more photos. These were taken on day 3-4 of wear, so there's a bigger gap now between the polish and cuticle. Hopefully these are a better example of the closeness of Nite Owl to All Hail The Queen.

Wednesday, December 5, 2012

Clinique's "Service As You Like It" Comes to Vancouver

Something pretty cool has arrived at The Bay in downtown Vancouver, and I think makeup and skincare lovers will agree with me when they see Clinique's new concept, "Service as you like it". The old Clinique counter at The Bay has been redesigned to deliver a unique experience to today's savvy shoppers.

With the arrival of the internet, consumer review sites like MakeUpAlley, and countless makeup blogs (ahem), I think the kind of experience we are looking for in a beauty counter is very different from our moms and grandmothers; we are better informed and more skeptical. Where previous generations might have listened closely while an SA explains a fantastic new eyeshadow, we're already thinking, pfft, Temptalia said it's chalky crap. (Not that people don't want to listen to SAs anymore, just that we have more sources of information readily available.) The new Clinique counter is created with consumers like me in mind, who prefer to explore products on their own, while still offering the full support and customer experience of a traditional beauty counter. 

(click to enlarge)
Here's a photo from Clinique's PR so you get an idea of just how amazing the new 1000-square foot Clinique space looks. It's bright (although not as super-bright as shown here) and is set up just like the photo.

You can start off by putting on a rubber band to communicate exactly the type of service to Clinique's consultants without ever saying a word. Green says you're someone that is looking to chat and get a full consultation. Pink says you'd like to browse mostly on your own and a consultant will only check in with you once in a while. White says you're in a rush and you know what you're looking for. I did find that while wearing the pink bracelet and walking around, consultants generally left me alone and only offered help if I was approaching them or made eye contact. It works!

I'd like to keep this bracelet to wear to other beauty counters! @__@
© Do Want Makeup 2016 | Blogger Template by Enny Law - Ngetik Dot Com - Nulis